Export Office 365 Archive Mailbox to PST File Effectively

Summary: In this article, we are going to discuss – what are archive mailboxes and how to export Office 365 archive mailbox to PST files for all users. We are going to clarify the user confusion between archiving and archive mailbox (Online Archive) and their uses. Without further discussion let’s get started!
Archiving is the process of moving data into a repository that can be used as a backup as a separate mailbox. This repository is available alongside a primary mailbox (Inbox) that can be used for storing emails separately.
In Office 365, we call this mailbox Online Archive Mailbox (In-Place Archive for Exchange On-Premise). It is an additional mailbox for storing emails separately from Inbox emails. After enabling the archive mailboxes, any user can access them to save their inbox email.
The benefit of an archive mailbox is that it provides you with a central location for storing emails that no longer need direct access. You can also set up an archive policy in Office 365. Moreover, this way users can keep their Inbox (primary mailbox) clean and easily accessible.
Benefits of Exporting Office 365 Archive Mailbox to PST
The following is the list of benefits that the user gets by exporting the O365 archive mailbox to PST:
- It reduces storage requirements in Office 365.
- It prevents losing data of the user.
- Increases server performance.
- It is easy to restore data when needed.
- Eliminates mailbox quotas.
- It provides easy search capabilities.
Different Methods for Office 365 Export Online Archive Mailbox to PST
Microsoft provides no direct method to O365 mailboxes, whether it is a primary mailbox or any other user-generated mailbox like the Archive mailbox. However, using indirect methods such as Outlook, users can export Office 365 archive mailboxes to PST.
Use Outlook for Exporting Archive Mailboxes From Office 365
Another method to export Office 365 archive mailbox to PST is with the help of a desktop Outlook Application. If you don’t have MS Outlook installed on your system, then simply prefer an automated solution.
Alert: There are different Office 365 mailbox types. So, the below method steps are only suitable for exporting single / few user mailboxes, not for organizational use.
Manual Working Steps to Export Archive Mailboxes using Outlook:
Step 1. Open the MS Outlook application on your desktop.
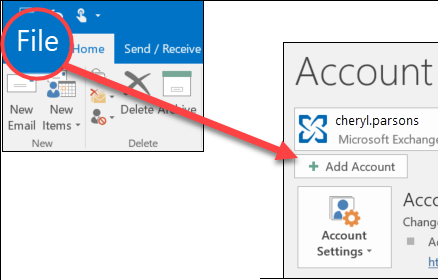
Step 2. Go to the File tab and click on the Add Account option.
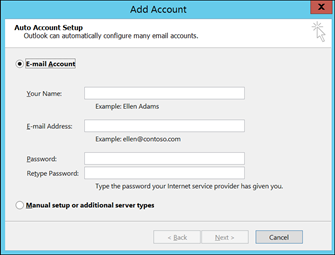
Step 3. Enter the details of the Office 365 account and configure it.
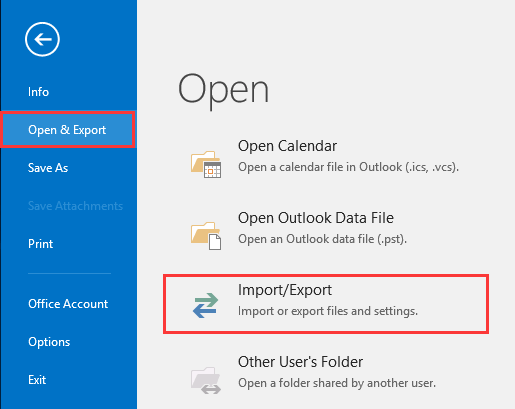
Step 4. After the configuration is finished, go back to the File tab and click Open >> Import/Export.
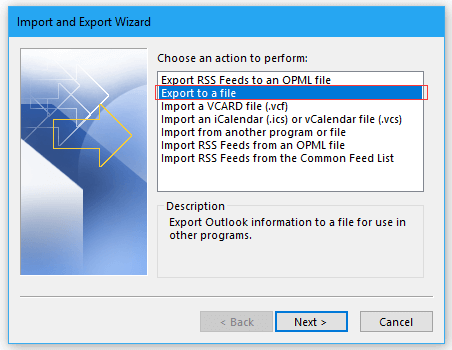
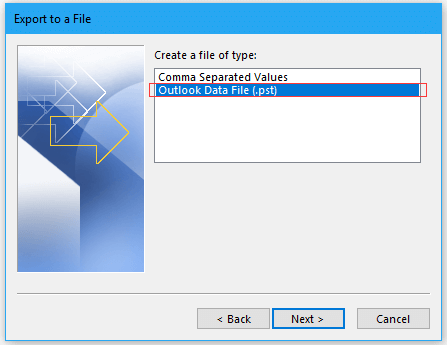
Step 5. Choose the “Export to a file” option from the Import/Export wizard.
Step 6. Now, choose the “Outlook data file .pst” option from the list.
Step 7. Select the Office 365 Archive mailbox from the list >> Next.
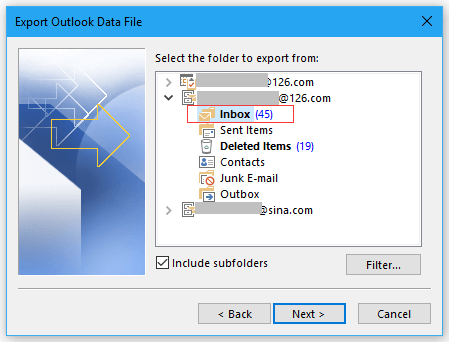
Step 8. Browse the location for the exported file, and click on the Finish button.

Now another method is by using the eDisocvery method offered by Microsoft, let’s have a glance at it.
What is the eDiscovery Tool and Its Needs?
Microsoft eDiscovery export tool is available in the Microsoft Exchange Admin Center (EAC). Using eDiscovery for the export process not only protects against data loss but also accesses all those files in offline mode.
The eDiscovery PST Export tool will help the user to export data from Office 365 so that it is easy for the client to gain Office 365 data. It has various features like Office 365 eDiscovery search etc. The user performing the method to export Office 365 mailbox to PST via eDiscovery PST export tool needs to make sure that their account is a member of the eDiscovery Management Role group.
Otherwise, the user needs to add this role to their user account. To activate Role management users need to select permissions, and double-click Discovery Management under admin roles. When the Discovery Management window appears, add then join to the group by clicking on + under Members.
Export Office 365 Mailboxes to PST Using eDiscovery Export Tool
Step 1. Login to your Microsoft Office 365 Portal, and navigate to Microsoft 365 Admin Center.
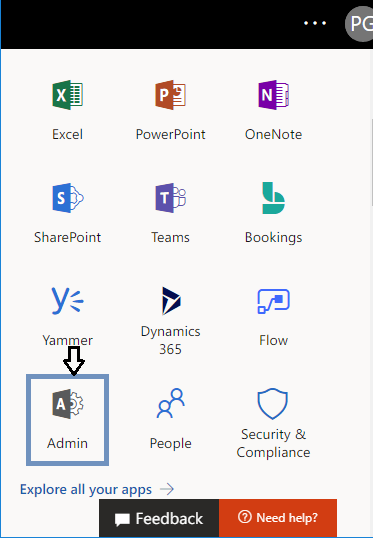
Step 2. Here you need to click on Security from the Admin Centers panel.
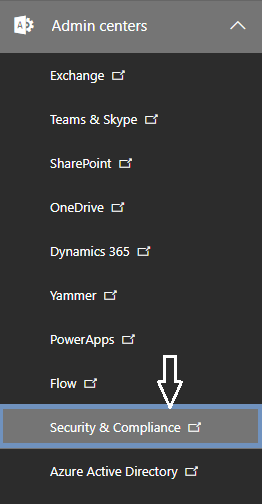
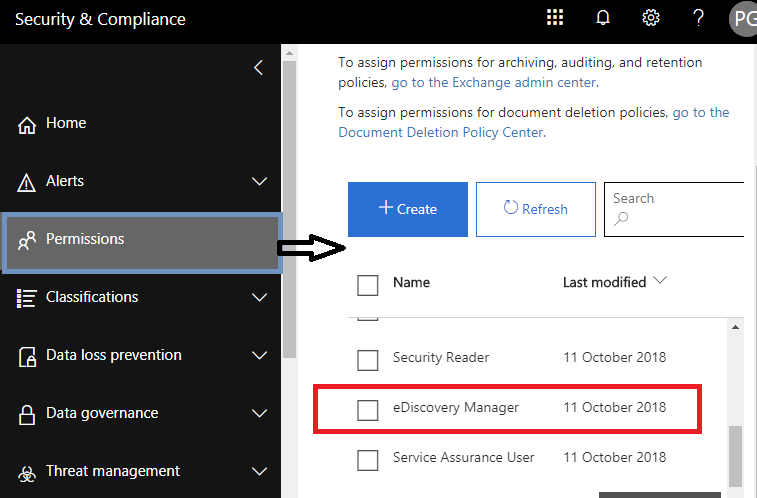
Step 3. It will redirect and open Microsoft 365 Defender Admin Center. Now navigate to Permissions > Email & Collaboration Roles > Roles and click on the eDiscovery Manager role group.
Note: Ensure, you are a member of the eDiscovery Manager role group, otherwise you would not be able to use eDiscovery features. Further, you might encounter errors in exporting search results.
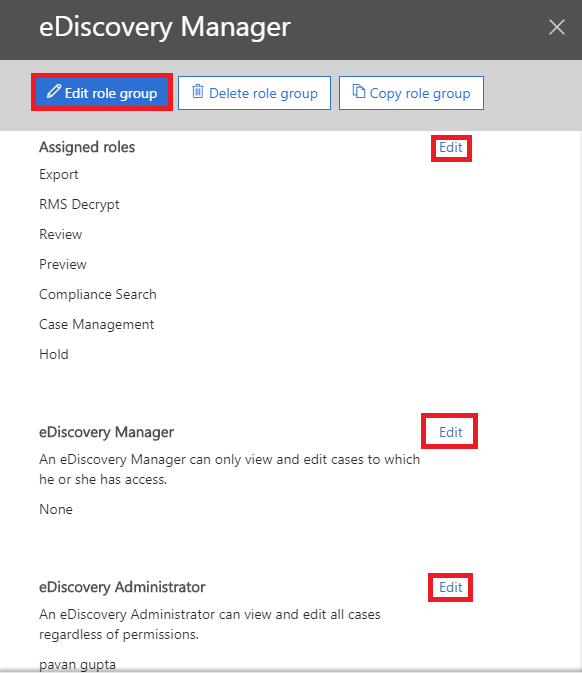
Step 4. Add your account to the eDiscovery Administrator list using the Edit button, from the eDiscovery Manager role group properties pane.
Note: The Role Group has by default assigned some roles such as Case Management, Compliance Search, Export, Hold, Preview, Review, and RMS Decrypt. Check if Export is missing here, if yes, then ensure, you have added Export Role by clicking the Edit Role Group button.
Step 5. Next, go back to the ‘Security and Compliance’ section and click on More Resources. Now, on the Microsoft Purview Compliance Portal click on Content Search >> New Search.
Note: If you can’t see the ‘Content Search’ option, then it could be due to the absence of eDiscovery permissions. So, make sure you set the necessary eDiscovery permissions. Also, it may take 24hr to reflect after you set the eDiscovery permissions.

Step 6. A new window will pop up once you click on New Search. Here, you can customize all elements of content search options. You can provide the details such as the Name & description of the search and location of the mailbox that you want to export.
Note: Under Location, if you want to you can enable the SharePoint Site and Exchange Public option. But, it’s gonna take a little longer to complete the search process.

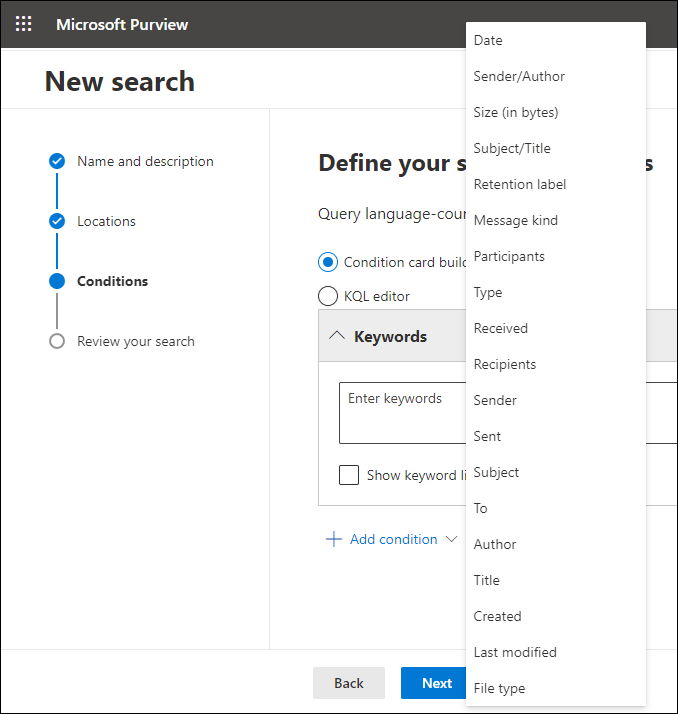
Step 7. Now comes the Conditions section. Here, you can apply different filters and specify query language/ region, keywords/phrases, and conditions.
Note: Conditions section is optional, so if you want to export the entire mailbox then don’t apply any filters.
Step 8. Once you apply all the necessary filters and required settings then click on Submit >> Done.
Step 9. After that, the search process will run in the background. And, in the meantime, you can check the status of the search from the Search tab.
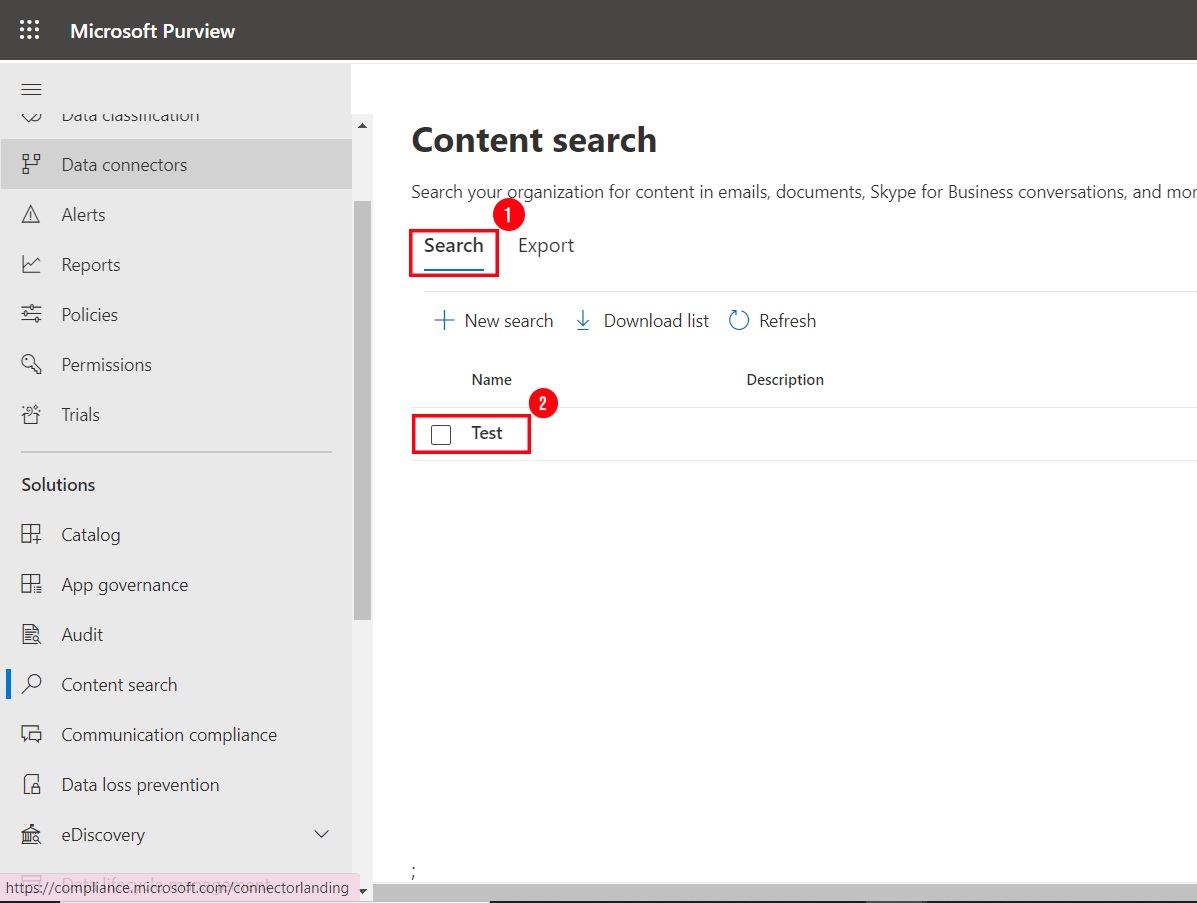
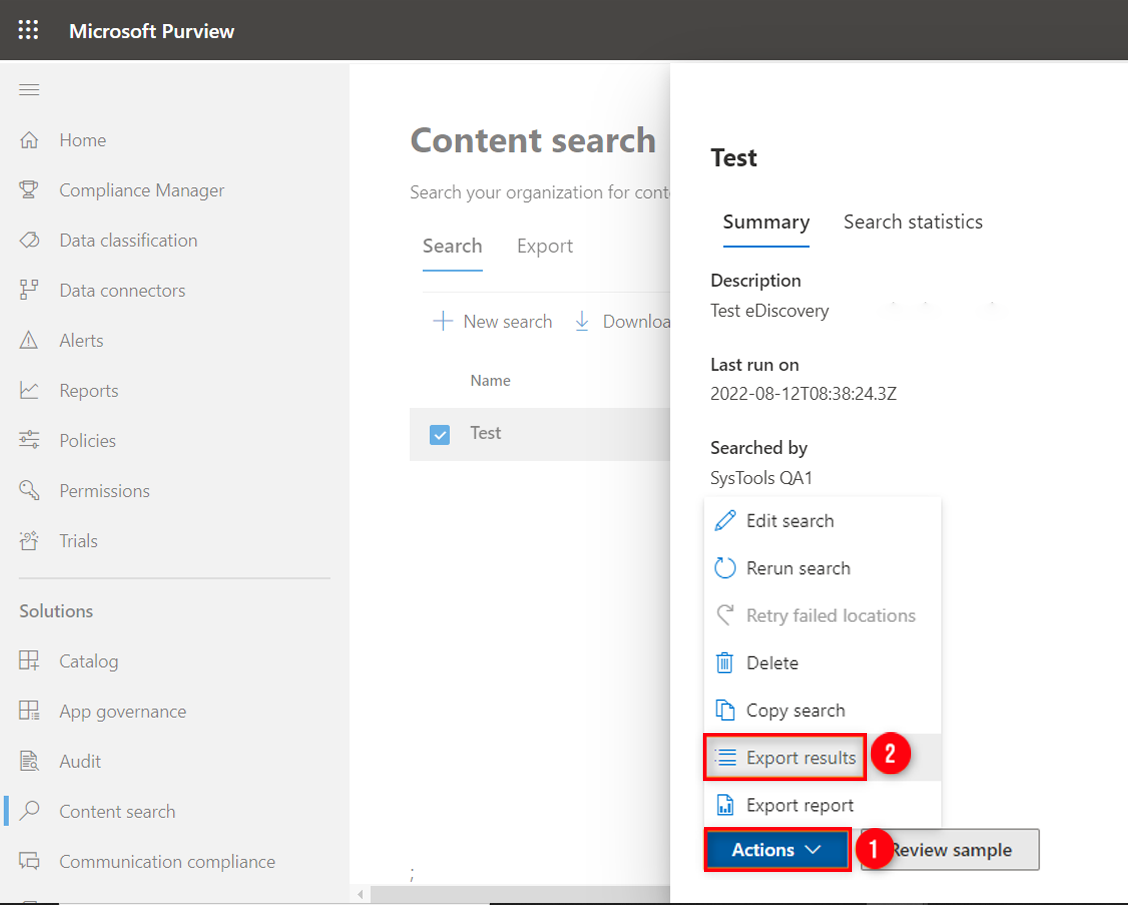
Step 10. Next, see whether the search is complete or not. Once you see the search results, click on ‘Actions’ and then choose Export Results.
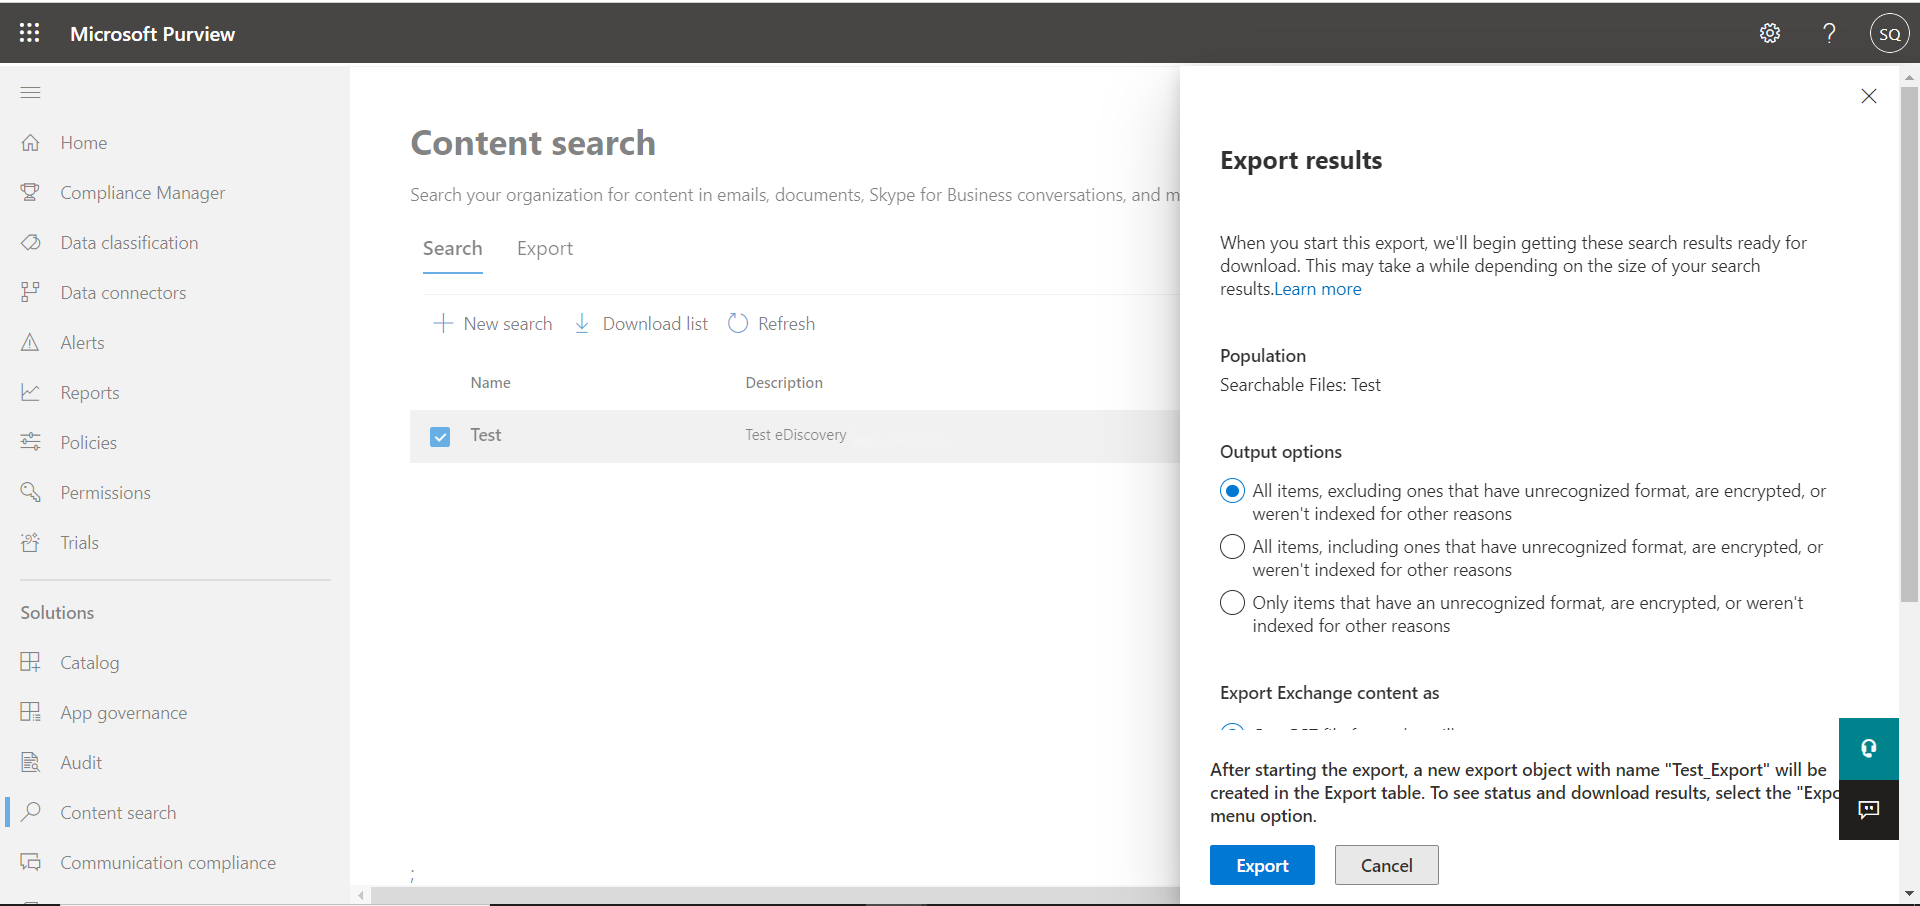
Step 11. After that, you will have various options to export the encrypted files. So choose the radio button from the Output Options as per your requirement and click on Export.
Note: If you want to avoid any confusion then don’t change the default options. Also, if you are willing to export the results as a single PST file then don’t click on Enable Depuplication option.
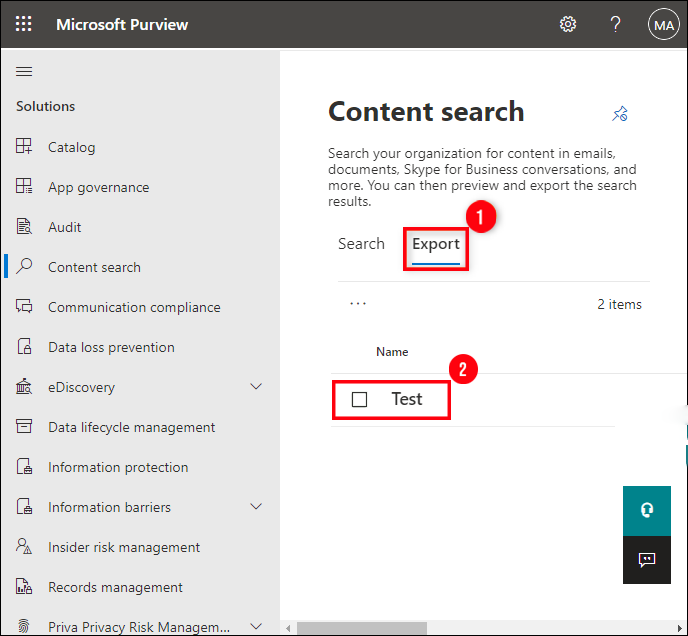
Step 12. Next, the export process will start. Now, you can check the progress of the ongoing export process by clicking on the Export tab.
Step 13. After the Export process is finished, click on the Download Results option. Then, click on the Copy to Clipboard button under the Export Key section which will be further needed in the next step.
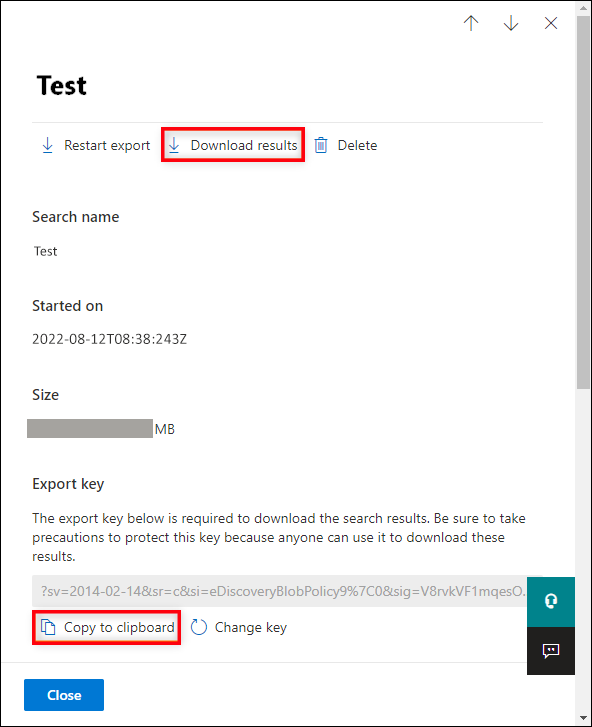
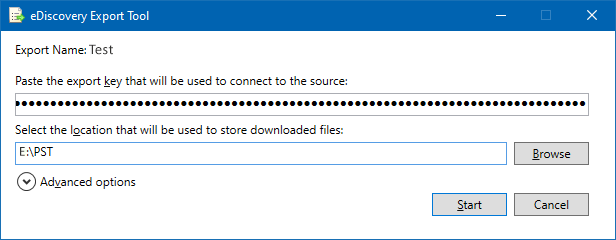
Step 14. When you click on the Download Results option, the eDiscovery Export Tool will start automatically. Here, provide the Export key you saved to the clipboard and Browse the destination path for saving the export result. Finally, click on the Start button to export Office 365 mailboxes to PST using eDiscovery.
Limitation of eDiscovery Export Tool
The eDiscovery PST export tool will help the user to export Office 365 mailbox to PST format but the exact data in a mailbox that is to be exported may not be migrated. Moreover, the eDiscovery PST export tool stuck calculating, hangs, slow, failed, or missing is the most common error that hinders the work using the export PST process. So, to solve this problem, it is recommended to use automation for the export process.
PowerShell to Export Office 365 Mailbox to PST File
It is no longer possible to export an Office 365 mailbox to a PST file using PowerShell. Microsoft has removed the ability to import or export PST files to/from Exchange Online using the New-MailboxExportRequest cmdlet.
As a result, you will need to use a professional tool to export mailbox data from Office 365 to a PST file.
FAQs Related to Office 365 Export Online Archive
Q. How do I archive Outlook 365 to PST using Outlook?
You can easily archive Outlook 365 to PST through Outlook by following the below five steps. However, before getting into the below steps. You need to configure your Outlook 365 user accounts with POP configuration in the Outlook desktop app.
- Step 1. Click on File > Open and Export > Import/Export.
- Step 2. Choose Export to a file, and then click Next.
- Step 3. Opt for Outlook Data File (.pst), and click on Next.
- Step 4. Choose the mail folder to archive and select Next.
- Step 5. Define the location to save, and click on Finish.
Q. How do I archive emails in Outlook 365 older than 12 months?
You can easily archive older emails using the built-in feature of Outlook 365 AutoArchive. To set it up, you can follow the below steps:
- Step 1. Click on File > Options > Advanced.
- Step 2. From AutoArchive, click AutoArchive Settings.
- Step 3. Choose Run AutoArchive every n days box and specify the n value for AutoArchive.
- Step 4. Opt for any other choices you want, like having Outlook delete old items instead of archiving them.
- Step 5. In this way, you can easily archive emails without any hassle.
Q. Where is the online archive stored in Office 365?
You can find it in your mailbox, it is also a folder and shows in the user’s mailbox similar to Inbox, Sent Items, and the Deleted Items folder, etc. You can not delete this folder from your mailbox. Moreover, all Microsoft 365, Outlook.com, and Exchange accounts have access to an Archive folder.
Q. How long does Outlook Online archive last?
For Draft and Inbox items the default period is six months, on the other hand, the Sent Items have a different archive period which is three months. However, these default settings can be changed using the Clean Out items older than an option.
Yes, this is considered the best alternative to the eDiscovery or PowerShell utility. It is a tried and tested tool and is recommended by many experts.
Yes, the above tool is specially designed for users who are not technically sound to assist them in exporting Office 365 mailbox to PST without any difficulty.
Conclusion
In this guide, we provide a comprehensive explanation of three potential approaches to export an Office 365 archive mailbox to PST. All of these methods are effective; however, it’s important to note that exporting Office 365 mailboxes using the eDiscovery method can be cumbersome, especially for Office 365 users who are not well-versed in the intricacies of the Admin Center. It is suggested to avoid this approach, as it could potentially result in corruption of the exported file during the process.
Additionally, for organizations aiming to export multiple users’ archive mailboxes, the automated method is the most appropriate choice. On the other hand, the manual method is best suited for individual users.