How to Migrate Proton Mail to Office 365 – 2 Simple Ways

Published: July 29th, 2024 • 7 Min Read
The privacy-focused Proton Mail lacks the critical tools that any business requires nowadays. Therefore, the need to migrate Proton Mail to Office 365 emerges naturally. Although Proton Mail is kind enough to provide an export tool free of cost, the tool is limited in scope and has no migration capability.
So, as a result, we prepared this write-up to answer all of the user queries. Additionally, we provide them with a clear pathway to move their data away from proton mail and into the feature-rich Office 365 environment. Let’s begin by exploring the reasons for such a change.
Why Perform Proton Mail to Office 365 Migration?
Proton Mail is world-renowned for its security features. Moreover, its data centers are located deep within the Swiss Alps, and with strict privacy laws, you get bulletproof data security. However, the fact of the matter is, that privacy alone is not enough to choose a webmail service. Therefore, given below are some of the reasons that force users to leave Proton mail.
- Lack of Features – Office 365 is not just a mailing service it’s an all-in-one business productivity tool, with options to communicate through Teams, store large amounts of data in Onedrive, and maintain servers via Exchange Online. All of these features are toned down or outright missing in Proton Mail.
- Limited Storage – The free version of Proton Mail only offers a measly 500 MB of data. You do not need an expert to determine how this limits communication. Moreover, the premium versions fail to compare to the unlimited storage that Office 365 offers in its subscription.
- Absence of Tools – Proton Mail also does not have any inbuilt alternative to Word, Powerpoint, or Excel all of which have become synonymous in the daily use in any organization.
Read More: The Means to Migrate Calendar from G Suite to Office 365 Effectively
Manual Method for Transferring Proton Mail Data to Office 365
A few additional requirements of the semi-manual process are as follows
- Install the Proton Mail Import-Export App.
- Download MBOX conversion Software.
- Get the Outlook for Desktop version for your PC.
Now we are ready to complete the switching of Proton’s email data manually
The manual method is not a direct transfer so we have broken down the entire process into three stages.
Stage 1. Use Proton Import Export Application
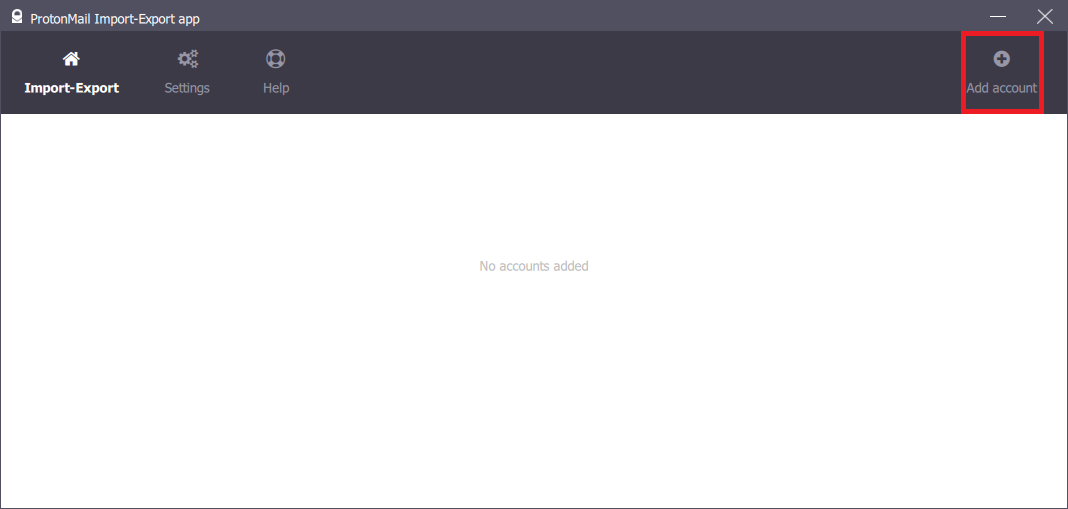
Step 1. Launch the Protonmail Import Export App and click on the Add Account option.
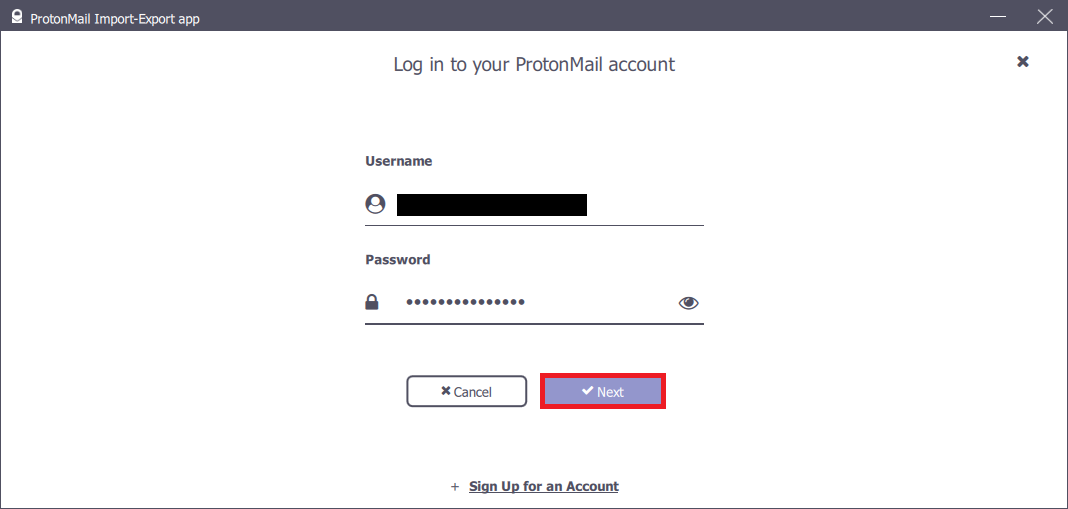
Step 2. Then, sign in with your Proton Mail credentials and hit the Next button.
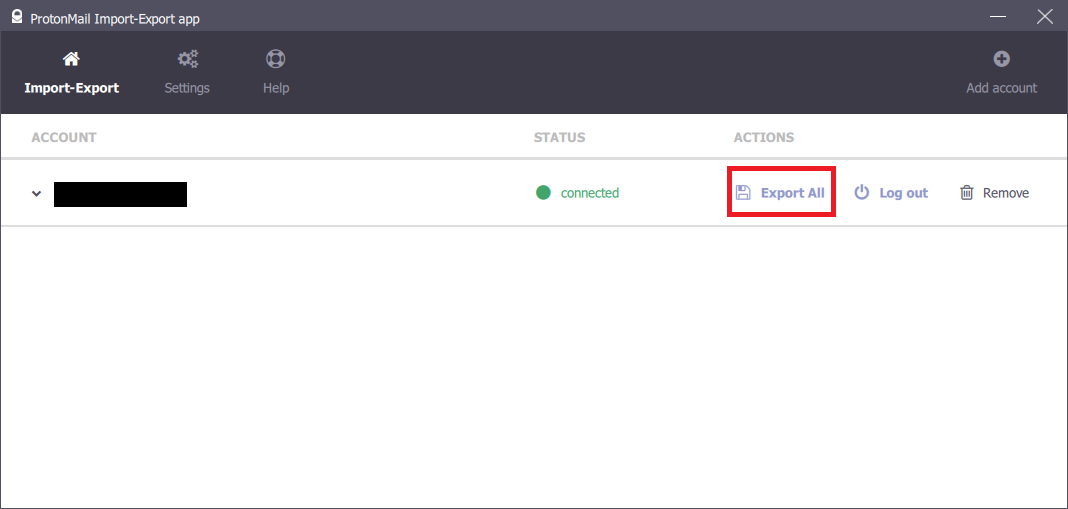
Step 3. Once the STATUS is “connected” click on the Export All option.
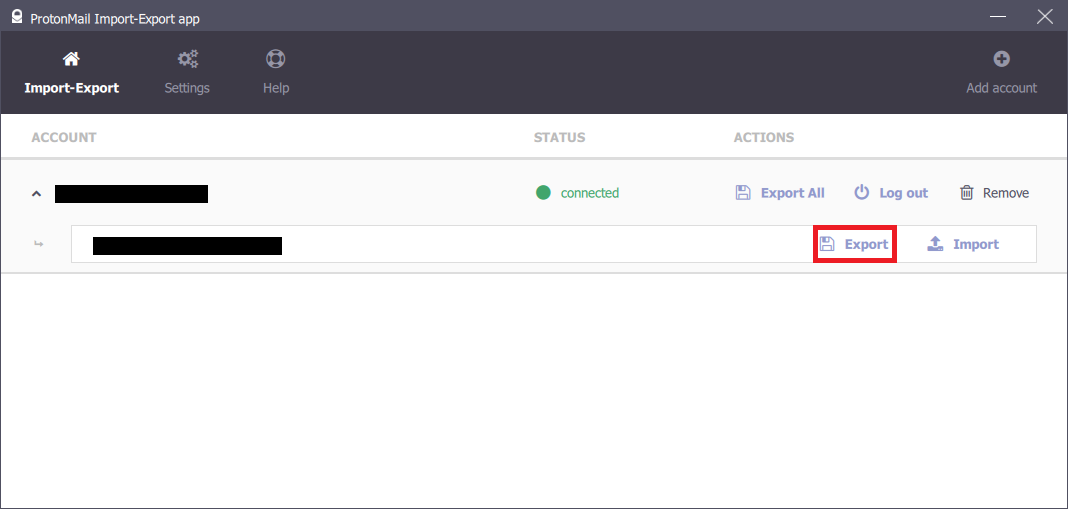
Step 4. Then, press the Export button to continue.
Step 5. Mark folders, apply the date filter and pick the MBOX format. Select a place to save the email data and click the Export button.

Step 6. Once the export is completed, press the Okay button.

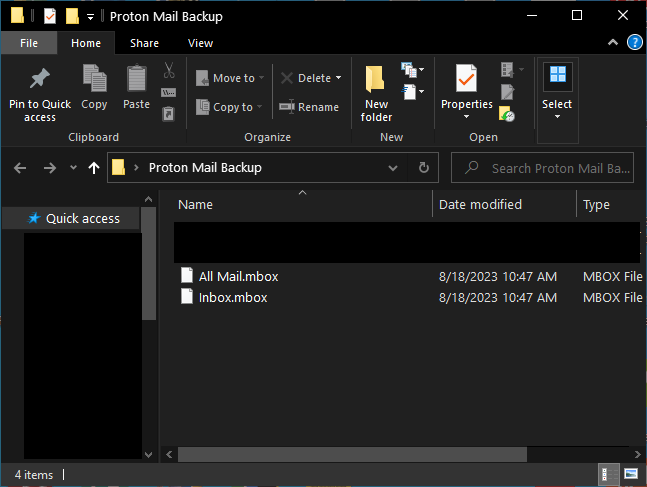
Step 7. View and verify your MBOX files at the location you selected this marks the end of the first phase of Proton Mail to Office 365 migration.
Stage 2. Convert the MBOX Data to PST File Format
To import your mailbox data into Outlook, which supports PST files while Thunderbird is MBOX supported, first you need to transfer the files from Thunderbird to PST. Here’s a straightforward guide to help you through the process: Here’s a straightforward guide to help you through the process:
Conversion of MBOX files into EML formats is the first and initial step in consolidating the mail program.
Thunderbird saves emails as MBOX files, Nevertheless, to import these messages, it is necessary to export them in EML format. Follow these steps:
- Open Thunderbird.
- Select the folder with the desired emails that you want to migrate and right-click on it and the new folder.
- Input a new name for the created folder and then click ‘Create Folder’.
- Drag the emails that you want to transfer to this new folder here.
- Open the new folder and, selecting all the received emails, export/copy/save them as EML files in the required folder.
Step 2. Import EML Files into Outlook
Outlook can open EML files on its own. To import your EML files into Outlook, follow these steps: To import your EML files into Outlook, follow these steps:
- Go to the folder containing your EML files.
- Choose the emails and right-click then a list drop down will appear, then select the Outlook folder.
Finally, the result can be seen through the review of the exported emails in the window below:
Step 3: Export Emails to PST Format
After that, you can import the obtained emails into the Outlook environment, but for proper functioning, you will need to transfer the mail into PST format. Here’s how:
- To do this, open Microsoft Outlook and in the ribbon, open the file.
- On the toolbar go to “File” and then click on “Open & Export” and then choose “Import/Export.”
- Select Export to a file option and then click on Next.
- Choose ‘Outlook Data File (. pst)’ and then ‘Next’.
- The choice “Get files from a folder” must be selected, and the window with the opportunity to choose the folder containing EML files should be opened; after selecting the EML files folder, the button “Next” must be pressed.
- Select a location for the PST file, set any options that are desired, and click on ‘Finish.
When done in this manner, then one will be sure that his or her emails are going to be successfully migrated from Thunderbird to Outlook.
Stage 3. Attach the PST file to Outlook Client
- Step 1. Open Outlook, and click on the File tab at the top menu bar.
- Step 2. Then, under the Open section, select the Import option.
- Step 3. Select the ‘Import from another program or file’ option in the Import and Export Wizard and hit ‘Next’.
- Step 4. Select Outlook Data File (.pst), and then select Next.
- Step 5. Then, directly enter the location and filename of the .pst file you wish to import or browse to locate the file to be imported. Once done press Next.
- Step 6. Finally, choose the folder you wish to import and hit the Finish button to complete the process.
Although the manual method is complete there are a few limitations that users must be aware of if they choose this way.
Limitations of Manual Method
- Time-consuming – Installing, configuring, and navigating through three different programs is a time-consuming affair. Instead of this users can directly migrate their Proton Mail data to Office 365 via the professional migrator.
- Error Prone – The constant shifting of data may induce unwanted corruption. Moreover, these errors may permanently damage some critical files requiring the users to start the process from scratch. At the same time, the automated utility encounters no such issues and even has a delta migration facility.
- Slow and Repetitive – Another major limiting factor of not using the advanced tool is that you have to export the data of each user individually.
Conclusion
In this article, we discussed two separate ways to migrate Proton Mail to Office 365. Out of these, the Automated tool is the clear-cut winner. Additionally, by direct transfer to the Office 365 environment, bypasses the need for file conversion entirely. So make the smart choice and go for the tool and lay rest to all migration-related woes.